How to setup BYOD in a one-box development environment D365FO
D365 Finance & operations have a plethora of features to explore, and one of them is Bring your own database (BYOD). BYOD enables you to push data from AxDB transitional Database to an external database like Azure SQL database hosted in same or other tenants.
BYOD uses existing data entities available in ERP to push the data to external databases, which can be used with Dataverse, External Data Warehouses for PowerBI reporting etc.
This article will explain how you can set up BYOD in a one-box development environment hosted on a tier-1 subscription or on-premises having an SQL server that can iterate external DB scenarios locally for development and testing purposes. For production environments, you must create an Azure SQL database.
Time needed:20 minutes
Steps
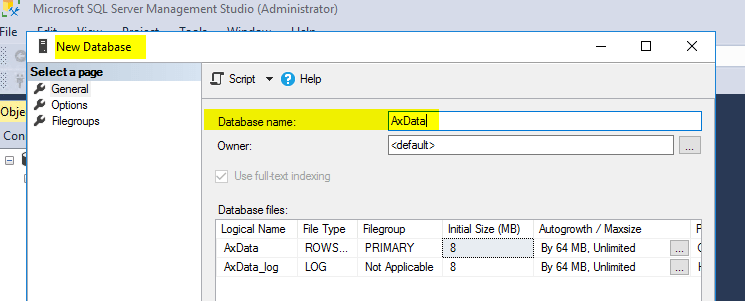
- 1. Create New Database in your one-box environment
Provide
- 2. Add axdbadmin user to the new database
Right-click on axdbadmin and click on properties.
Select the User Mapping tab and add AxData DB with db_owner database role.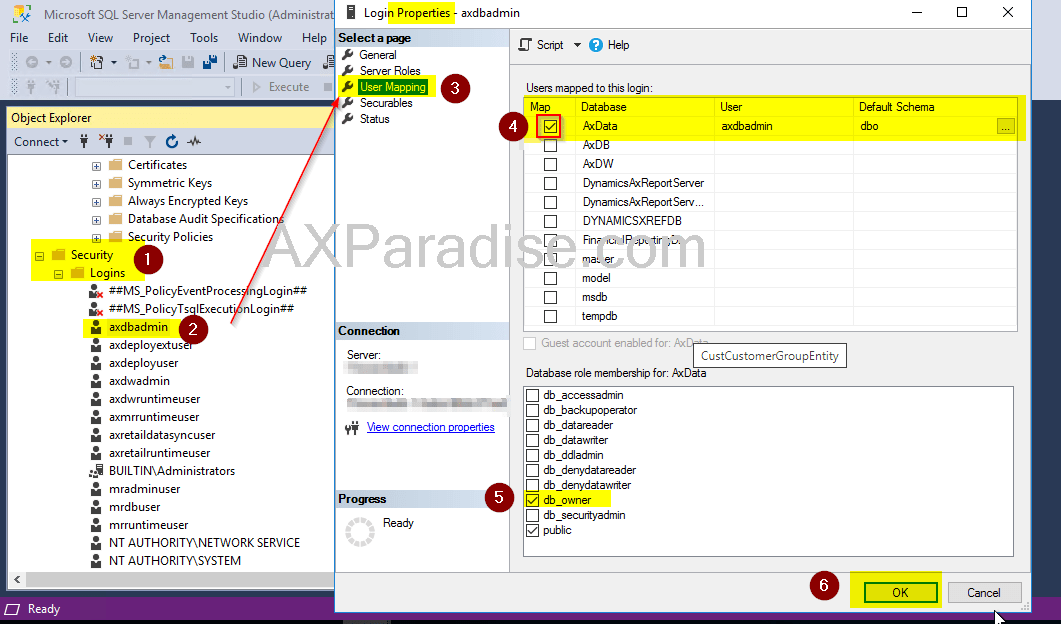
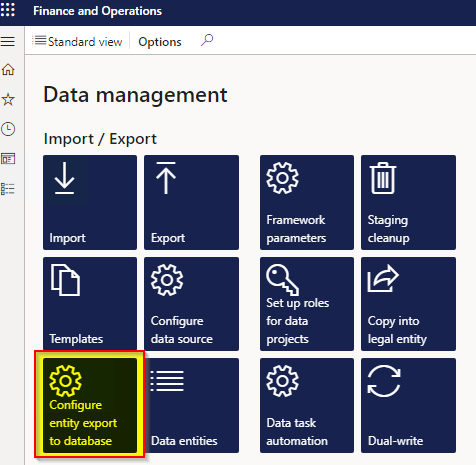
- 3. Go to System administration -> Workspaces -> Data Management
Open Configure Entity Export to Database tile and click on the new button.
- 4. Configure Entity export to database and click publish
Enter source name, connection string and click on validate button. Info message – Tests Completed successfully is displayed if the connecting string is valid.
The connection string should be of the format.
Data Source=serverName;Initial Catalog=databaseName;Integrated Security=False;User ID=userid;Password=***
Disable Create clustered column store indexes as it is only available for SQL premium Databases.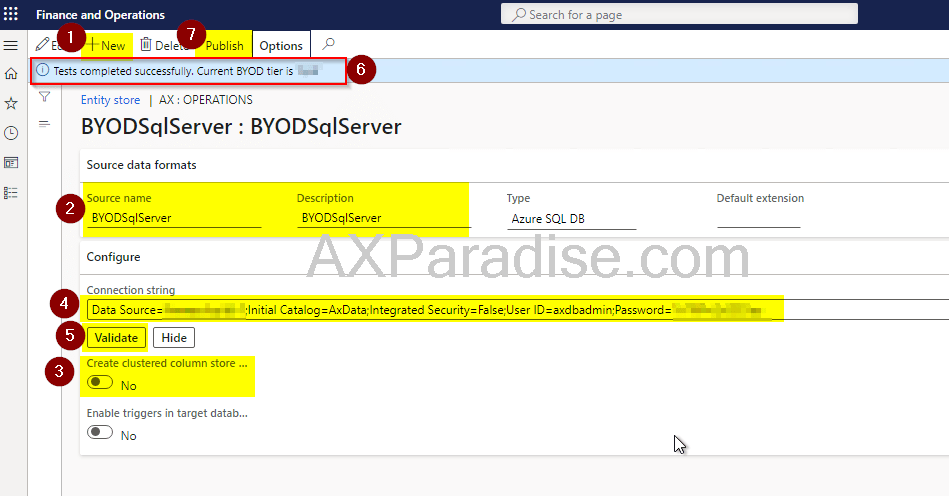
- 5. Select entities to be published.
Click publish entities for the selection, and ERP will schedule the batch and publish the selected entity in the database.

- 6. Verify newly created Tables in SSMS
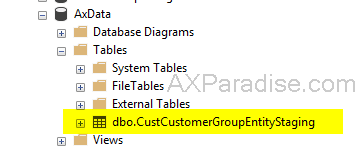
Entities published above are created as tables in the new database AxData from its schema.
- 7. Export
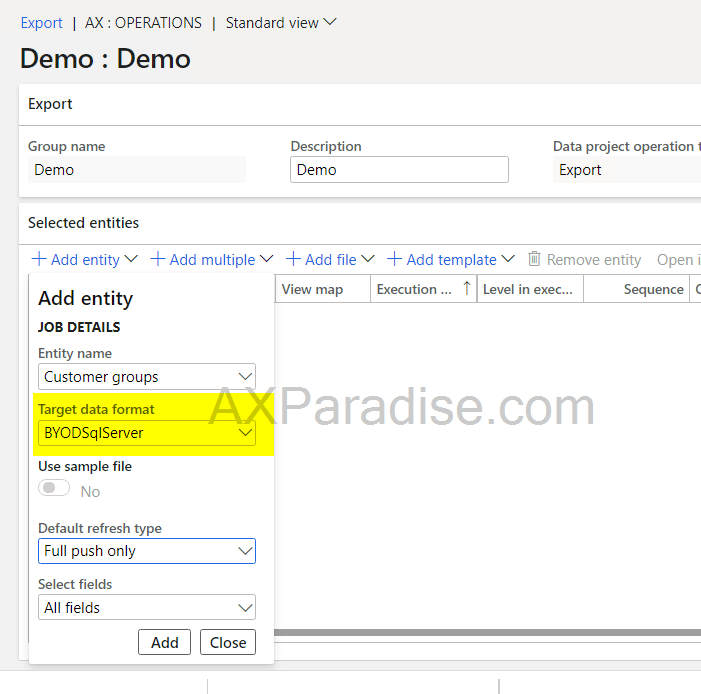
Go to the Database management workspace. Create a new Export project, add the entity and select Target data format as BYODSqlServer created in the 4th step.
- 8. Verify the newly created database table
Data would be populated for the selected entity in AXData Database.
We can enable change tracking for the database and schedule a periodic batch for the incremental push feature of data management export functionality to ensure consistent data in the external database.
I hope this article helped you learn how to set up BYOD in a one-box development environment in D365 Finance & operations AX. Don’t forget to share this article. You may also want to see our article on How to create QR code in SSRS report in D365 F&O. You can follow us on Facebook for more tips and tricks.

 Facebook
 Linkedin
Comments: 4
Very helpful
Amazing article for beginners. We need more of this due to limited resources about Dynamics 365 and Dynamics AX.
Thanks for your tutorial, but I still getting error :
Incorrect connection string. The connection string should be of format Data Source=serverName;Initial Catalog=databaseName;Integrated Security=False;User ID=PlaceholderUserId;Password=PlaceholderPassword
I try to copy the connection string from Env. Test but still get the error.
use azure db credentials to create a connection string.
Regards
zeeshan